

Automate the removal of old disk snapshots in Azure
- Alejandro Gaio
- Mar 16, 2024
- 14 min read

Updated: Mar 21, 2024
2024-03-21 UPDATE: While Backup vault policies seem to allow specifying an "operational data store" -aka retention period-, this post and the accompaning code were born to deal with the problem of removing resources that don't have an automated way of being removed. So the code can be adapted quite easily to process other kind of resources. A policy's default retention period is 7 days, but I reached the limit of 500 snapshots (taken during 250 days, twice a day)... so I wonder if that "operational data store" is something quite new. Anyway, keep reading to gain some insights on Azure resource management =)
While developing a disaster recovery plan for the resources I manage in Azure, I arrived to the virtual machines assets.
Azure offers a service called Backup Vault, that can be used to protect other resources like disks, blobs, PostgreSQL server databases, MySQL databases and Kubernetes services in Azure.
Virtual machines (VMs for short) can be part of a list of assets that can be protected by backup vaults by taking regular snapshots of their disks.
Backup vaults work by defining a backup policy: what type of entities to backup (disks, blobs, etc), how long to keep them (retention period), and how frequently to execute the backup operation (schedule).
I configured this policy to take VM disk snapshots every 12 hours, which, for the workload they were having, was secure enough not to loose any important information should a disaster happen while still being a cost-effective solution.
The configuration of the policy is quite easy, so once it is done, you can let the vault alone doing its job... can't you?
Snapshoting disks could potentially run for a long time in Azure, if it weren't for two reasons:
The client could end up paying a lot for storage (I knew this one)
Each disk has a limit of 500 snapshots (I didn't know this one)
So, doing a fast calculation:
=> 500 limit / 2 snapshots per day = 250 days running backups without any problems.
After the day 251, I started receiving notifications that the backup of some disks failed.
Deleting snapshots manually
This was a temporary workaround to allow for the daily backups continue working.
The easiest way to remove these elements manually is by using the Azure portal.
The Storage Explorer utility cannot be used, since snapshots, although a disk-dependent resource, are stored directly in Resource Groups (which are containers used to organize other resources), not in storage accounts, so they are not visible to this application.
To delete snapshots:
Log into the Azure portal
Look for the element "All resources" and select it. The portal will show a table with all the subscription resources.
In the filter box, type "snap". A list of all elements with "snap" in their name, type or other properties will be listed.
Select the snapshots to delete, starting from the oldests.
Click Delete in the table header toolbar.
Read the warning and type "delete" in the confirmation box.
The image below shows the items described above:

Once some room was made for the new snapshots, the backup started to work again.
But I wasn't going to set myself a calendar reminder to delete these items manually, so I decided to find out possible solutions.
Available automation options
After some investigation, I found that I had a couple of options available in order to automate the deletion of snapshots, all which had some sort of programming involved:
Create an automation account and create a runbook there, which is a script made in Python or Powershell
Create an Azure function, which is a serverless approach to execute code in the cloud, also referred as FaaS (functions as a service).
Creating an automation account and a runbook sounded fun, although I'm not an avid user of Powershell. Regarding Python, I don't have enough hands-on experience to try in that language either.
On the other hand, I work with C# on a daily basis, and felt very confident about doing something new with it, so I decided to give it a shot and went full on with Azure functions.
Azure functions structure
Functions in Azure can be written using several languages (C#, Python, Javascript, Powershell, Java, Typescript), but beyond that, all share these common properties:
They must have exactly one trigger: a condition that causes the function to run.
They may have input or output bindings, which are additional resources connected to the function in a way that avoids hardcoding those accesses into the function itself.
A function body: the code that runs
Among the different types of triggers available, I was looking for an unnattended type and there it was the Timer trigger.
As per the bindings, since I needed to access resources in a resource group I was hoping to find one "resource group binding" or something alike, but I guess having this kind of access into a function would be too broad and dangerous. Resource groups are high-level container, and messing with them could cause wreak havoc in the subscription.
Thankfully, there are some Nuget packages that make it really easy to deal with resource management in Azure, which will be explained later in this post.
Having access to resource group elements was only the first challenge. Then I had to think of a practical way to define filters in the function, in order to process only specific elements in the resource group, and finally, remove the ones that matched one of those filters.
Configuring the Azure environment to run the function locally (development)
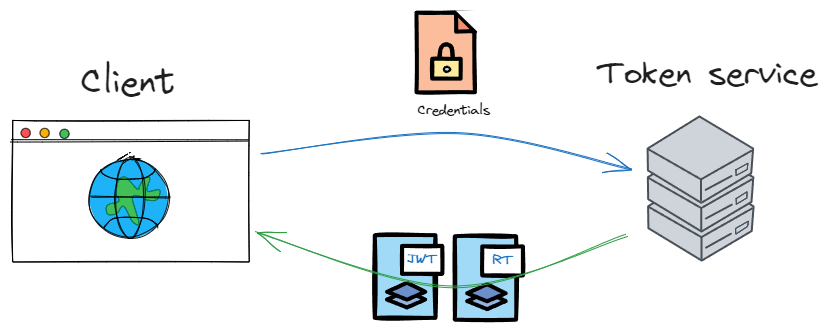
In a production environment, the most secure way to run the function and let it access other subscription resources is to configure it to use a managed identity.
A managed identity is basically an Entra ID (formerly known as Azure AD) account created for a resource -the function in this case- in order to authenticate with the platform and gain authorization to access other resources, without resorting to the use of hardcoded credentials.
Development environments don't support managed identities since these are cloud-specific objects, so the recommended approach is to create an App Registration in Azure.
An App Registration is a representation of an application (the function in this case) in the tenant, and as such, a service principal is created for it. This means that it can act as a service with a provided identity, it can be assigned roles or be added as a security group member.
The proper procedure in order to configure on-premises access to Azure resources is described in the following article: https://learn.microsoft.com/en-us/dotnet/azure/sdk/authentication/on-premises-apps?tabs=azure-portal%2Cwindows%2Ccommand-line
But in case you don't want to spend time reading it right now, the procedure includes the following steps:
Create an App registration for the Azure function. This creates a service principal for the application and assignsit a Client ID.
Create a new client secret for the app.
Assign roles to the application service principal. For this, you must locate the resource group where the snapshots are stored, the go to the access control (IAM) section and assign the Reader and Microsoft.Compute/snapshots/delete role.
The snapshots cleaner function
The body of the snapshots function does the following:
Connects to Azure and accessess the configured resource group
Gets a list of resources filtered by a condition (i.e.: type = snapshot)
Checks that each item in the list matches at least one custom filter defined in the filters.json file.
Checks that the filtered item passes the age test (global filter)
If passed that test, deletes the item.
Connect to Azure and access the resource group
The code is easy to understand, lets check the following lines:
TokenCredential cred = new DefaultAzureCredential();
ArmClient client = new ArmClient(cred);
var subscriptionId = Environment
	.GetEnvironmentVariable("AZURE_SUBSCRIPTION_ID");

var resourceGroupName = Environment.
	GetEnvironmentVariable("AZURE_RESOURCE_GROUP");

ResourceIdentifier resourceGroupResourceId = ResourceGroupResource
	.CreateResourceIdentifier(subscriptionId, resourceGroupName);

ResourceGroupResource resourceGroupResource = client
	.GetResourceGroupResource(resourceGroupResourceId);
You might be asking yourself, where the h#ll are the credentials to connect to Azure?
Well, that's the "magic" of the DefaultAzureCredential class, which is part of the Azure.Identity package.
This class will check for several sources for identity information and will provide the first available one to the classes that need to authenticate to Azure, like ArmClient (which is the Azure Resource Manager client).
The DefaultAzureCredential class uses the following environment variables needed for authentication:
AZURE_TENANT_ID: The id of the tenant (not the subscription!)
AZURE_CLIENT_ID: The id the registered app (not the function!) (*)
AZURE_CLIENT_SECRET: The client secret created earlier (*)
* These variables should NOT be created in Azure when the function is finally published, if it's going to run under a managed identity (which is highly recommended). The reason is that DefaultAzureCredential uses AZURE_CLIENT_ID and AZURE_CLIENT_SECRET for other types of authentication, but not for managed identities, which, under the cover, use the ManagedIdentityCredential class. If AZURE_CLIENT_ID happens to be defined and the function uses a managed identity, you may encounter errors like "No User Assigned or Delegated Managed Identity found for specified ClientId".
In the end, the resourceGroupResource variable will contain a reference to the resource group container configured by the environment variable AZURE_RESOURCE_GROUP. Keep in mind that CreateResourceIdentifier needs also the subscription ID, referenced by the AZURE_SUBSCRIPTION_ID variable.
Get a list of resources filtered by a condition
var filter = "resourceType eq 'Microsoft.Compute/snapshots'";
var expand = "createdTime";
var resList = resourceGroupResource.GetGenericResourcesAsync(filter: filter, expand: expand);
The first line defines a filter expression to narrow the resources retrieved by GetGenericResourcesAsync.
The second line defines an additional property that we will need in order to perform the age test for the snapshots.
Finally, the resList variable will contain the queried resources.
Check that each item in the list matches at least one custom filter
Before explaining this part, let's explaing first how filtering is implemented in the function.
Filter structure
The following class represents a filter used by the cleaner function:
public class SnapshotFilter
{
    public class Tag
    {
		public string? Name { get; set; }
		public string? Value { get; set; }
		/// <summary>
		/// When true, if a tag is found, the value will not be checked, and will still be considered a match
		/// </summary>
		public bool MatchOnlyWithName { get; set; }
    }
    public int Id { get; set; }
    public string? Description { get; set; }
    public string? StartsWith { get; set; }
    public List<Tag>? Tags { get; set; }
}
The main properties of a filter are:
StartsWith: a string the resource name must start with.
Tags: A collection of tags (*). If the list of tags is not empty, the resource must contain at least one tag that matches one of the list.
Id: The filter id. Only used to relate filtering log data with a specific filter.
Description: Not used in code, just for information purposes.
(*) Tags are key-value pairs that are part of all Azure's resources metadata. They can be used to filter, search and organize resources in the platform.
Filters are defined in a separate json file called filters.json, with the following structure:
{
  "SnapshotFilters": {
    "Filters": [
      {
        "Id": 0,
        "Description": "Process snapshots starting with 'AzureBackup_'",
        "StartsWith": "AzureBackup_",
        "Tags": [
          {
            "Name": "CreatedBy",
            "Value": "AzureBackup",
            "MatchOnlyWithName": false
          }
        ]
      }
    ]
  }
}
Azure backup sets a tag in each created disk snapshot with the "CreatedBy" and "AzureBackup" key-value pairs, which is useful to our function in order to avoid processing other snapshots that should not be deleted.
Filtering function
The filtering function receives an Azure resource item and a filter defined in the json file, and checkes whether the item passes or not the filter.
If it passes the check, the filter Id is returned, otherwise null is returned.
private int? CheckIsSnapshotFiltered(GenericResource item, SnapshotFilterOptions.SnapshotFilter filter)
{
  var itemName = item.Data.Name.ToLower();
  if (!string.IsNullOrEmpty(filter.StartsWith))
  {
    if (!itemName.StartsWith(filter.StartsWith.ToLower()))
      return null;
  }
  if (filter.Tags != null && filter.Tags.Count > 0)
  {
    // If filters are defined, but the item has no tags, it's not a match
    if (item.Data.Tags == null || item.Data.Tags.Count == 0)
      return null;
    foreach (var tag in filter.Tags)
    {
      if (item.Data.Tags.ContainsKey(tag.Name))
      {
        if (tag.MatchOnlyWithName)
          return filter.Id;
        if (string.IsNullOrEmpty(tag.Value))
          continue;
        var value = item.Data.Tags[tag.Name];
        if (!string.IsNullOrEmpty(value) && value.ToLower() == tag.Value.ToLower())
          return filter.Id;
      }
    }
  }
  return null;
}
Check that the filtered item passes the age test (Global filter)
The variable SNAPSHOTS_DAYS_TO_KEEP is used for that purpose, as shown in the following code snippet:
var daysToKeep = Environment.GetEnvironmentVariable("SNAPSHOTS_DAYS_TO_KEEP");
...
int.TryParse(daysToKeep, out int days);
...
var itemsToDeleteList = new List<GenericResource>();
...
// check that the snapshot passes the filters
foreach (var f in filters)
{
  var filterId = CheckIsSnapshotFiltered(item, f);
  if (filterId.HasValue)
  {
    _logger.LogInformation($"Snapshot {item.Data.Name}, created on {item.Data.CreatedOn?.ToString("s")} passed filter id {filterId}.");

    if (item.Data.CreatedOn.HasValue && item.Data.CreatedOn.Value < DateTime.UtcNow.AddDays(days * -1))
    {
	  itemsToDeleteList.Add(item);
	 _logger.LogWarning($"The snapshot {item.Data.Name} is marked for deletion.");
    }
    else
      _logger.LogInformation($"Snapshot {item.Data.Name} was outside the deletion time window");
  }
}
The function's schedule
As with many other configurable settings in this function, the schedule is defined with an environment variable:
"FUNCTION_SCHEDULE": "0 0 21 * * *"The schedule is defined as a NCRONTAB expressions. For more information, check this link: https://learn.microsoft.com/en-us/azure/azure-functions/functions-bindings-timer?tabs=python-v2%2Cisolated-process%2Cnodejs-v4&pivots=programming-language-csharp#ncrontab-expressions
But to explain it simple, the expression is composed, starting from left to right, of the seconds, minutes, hours, days, months and day of week parts.
In the example above, right to left,, the function is set to run every day of week (*), of every month (*), every day (*), at the hour 21, minute 0, seconds 0.
The function's signature references the environment variable in the TimerTrigger attribute:
public async Task CleanSnapshots([TimerTrigger("%FUNCTION_SCHEDULE%")] TimerInfo timerInfo)Deletion of marked items
The code is self-explanatory:
foreach (var item in itemsToDeleteList)
{
	_logger.LogWarning($"Deleting snapshot {item.Data.Name}...");
	var armOp = await item.DeleteAsync(Azure.WaitUntil.Completed);
	var azResponse = armOp.UpdateStatus();
	if (azResponse.IsError)
		// TODO Add more useful error information
		_logger.LogError($"Error deleting snapshot {item.Data.Name}: {azResponse.Status}");
	else
		_logger.LogWarning($"Snapshot {item.Data.Name} deleted.");
}
Publishing the function and configuring Github actions for continuous deployment
For this task I use Visual Studio. Please check the corresponding documentation if you wish to go on with VS Code or other tools.
Before continuing with the Visual Studio screenshots, I must warn you that the Publish to Azure feature seems to be flawed, at least in VS versions up to 17.8.7.
The problem is that the screen to create a new resource, even after completing all the required items (name, subscription, resource group, location, storage account, etc.) does not enable the "Create" button, so you're stuck there:

After googling around, I found a post in StackOverflow with a temporary workaround. Basically, you must create the resource group and storage account in the Azure portal first, and the come back to this publishing screen and select the created resources where appropriate.
Publishing from Visual Studio
In order to publish the function to Azure, right click the project in Solution Explorer and select "Publish":

In the next screen, click "New profile", and after that, a new screen will appear, allowing you to select the publishing target:

Click Next and select either Azure function App (Windows) or Azure function App (Linux).
Click Create to create a new function resource:

Fill all the required information for resource creation:

After hitting "Create", the function and associated resources will be created in Azure.
In the following screen, you may leave the settings as shown. The "Run from package file (recommended)" checkbox is a new feature which lets you run a Web App or Function App by simply pointing it to a zip file containing the files.

Click Next to begin with the continuous deployment section.
Configure Github actions for continuous deployment
After the previous screen, the next one is presented where you can choose to publish the function, or use a CI/CD workflow from Github. Let's select this one and click finish.

Visual Studio will create a publishing profile and will add a Github actions workflow in the .github\workflows folder. In my case, this file is named SnapshotsCleanerFunc.yaml.

Click Close to dismiss the dialog.
The profile information should look something like this:

Now, every time you commit and push changes to your repository, Github will trigger a workflow action that will build the project and update the Azure function in the platform.
If you're curious, take a look to the generated yaml file.
Completing the function configuration
Publishing the function is only the first part of the task. Now we must configure it not only to run, but to access other Azure resources.
Environment variables
Although there are ways to map variables defined in the local project's local.settings.json file to app settings when publishing, I prefer to set them directly in the portal.
Find the created resource group in the portal, and look inside for the function:

Navigate to the Environment variables menu in the sidebar, under Settings, and add the following variables:

AZURE_TENANT_ID: Your Azure tenant ID. To find this out, search in the portal for Microsoft Entra ID, and in the Overview blade find the label "Tenant ID".
AZURE_SUBCRIPTION_ID: The subscription ID where the resource group containing the snapshots is located.
AZURE_RESOURCE_GROUP: The name of the resource group where Azure backup stores the disk snapshots. Please be aware that this is not the resource group we created for the function! (Unless you chose it on purpose, of course).
SNAPSHOTS_DAYS_TO_KEEP: The days to keep snapshots even when they pass the filtering stage.
FUNCTION_SCHEDULE: The NCRONTAB expression that defines when the function runs.
Allowing the function to access the target resource group
If it happened that the function was triggered because of its schedule, an error would appear in the logs, because the function has no access to the target resource group.
There are a couple of ways to do so, but the most secure is to create a managed identity for the function, and access the target resources using this identity.
A managed identity creates an entry in Microsoft Entra ID for the function. Then, this identity is presented to other resources for authorization.
In order to configure the function to use a managed identity, head to the function iteself in the portal and navigate to the Identity menu under Settings, in the sidebar.
Slide the Status switch to the "On" position and click Save. Confirm the creation of the identity in the dialog that appears:

Create a role with the needed permissions
We could assign a wide-scope role to the function in the target resorce group, like the Contributor role, but that wouldn't be very wise. We must always follow the least-privilege principle.
We need just two permissions: read objects from the resource group, and delete snapshots.
So what we're going to do is create a custom role that will contain just these permissions, and then create a role assignment: the custom role (permissions) will be assigned to the function (resource) in the resource group (scope).
To start creating a custom role, go to the target resource group that holds the snapshots.
In my case, the target resource group it's called Cloud1, (yeah I know, so original...), and click on the Access control (IAM) menu in the sidebar. On the right side, click Add and select Add custom role:

In the dialog that appears, enter the role name, a description (optional), select Clone a role and find the Reader role:

Click Next to begin adding more permissions. In the next screen, you must click +Add permissions, and in the right-hand side, type Microsoft.Compute.
This will load all the permissions related to that namespace.
From the list, scroll down and select only Delete: delete snapshot under Microsoft.Compute/snapshots:

After clicking Next, you must remove the current scope (the target resource group) and add the subscription as the Assignable scope.
This will allow the custom role to be assigned to other resource groups if needed.

That's it for the custom role.
Now it's time to assign it to the function, so again in the target resource group, Access control (IAM) section, select Add -> Add role assignment:

In the members section, click +Select members, and type "snap" to let the screen show the cleaner function (if you don't do it, only users and groups are shown):

Click the function, then Select, and complete the assignment.
That should be it! Now the function is configured with the needed variables and is assigned the required permissions to access the target resource group.
Verifying the function by manually triggering it
The function is triggered by a timer, so in order to try it manually we have 2 alternatives:
Use the other function that comes with the code, called ManualTrigger. The source code only enables this function in development mode, but you are free to comment the "#if DEBUG" section surrounding it and make it available in production.
Use the "Azure way" to manually call non-http triggered functions.
The latter can be done using Postman, with this configuration:
{ }If everything is ok, you should receive a 202 Accepted http status code.
Checking the logs
Before triggering the function, I recommend you to open the Log stream blade of the function and select Filesystem Logs, and then trigger the function, so you can see the event live:

Conclusion
This project was born as a workaround to a particular problem I was facing, but also as a challenge to myself, since it required to put several areas of knowledge together.
Despite the fact that manually deleting snapshots should relieve (temporarily) the platform's limit problem, resorting to such a task is cumbersome and error-prone, so it's an ideal candidate to run it in an automated way.
As there might be some of you (Azure clients) facing this same issue, my wishes from the start of this project were to make it available for everyone, so here is the link to the repository that complements this post: https://github.com/alegaio7/Azure-Backup-Snapshots-Cleaner
Feel free to send me any comments or experiences you had dealing with with Azure limits. See you!


Comments